The whole process has two bigger parts:
In order to enter DNS records, you will first have to do two things:
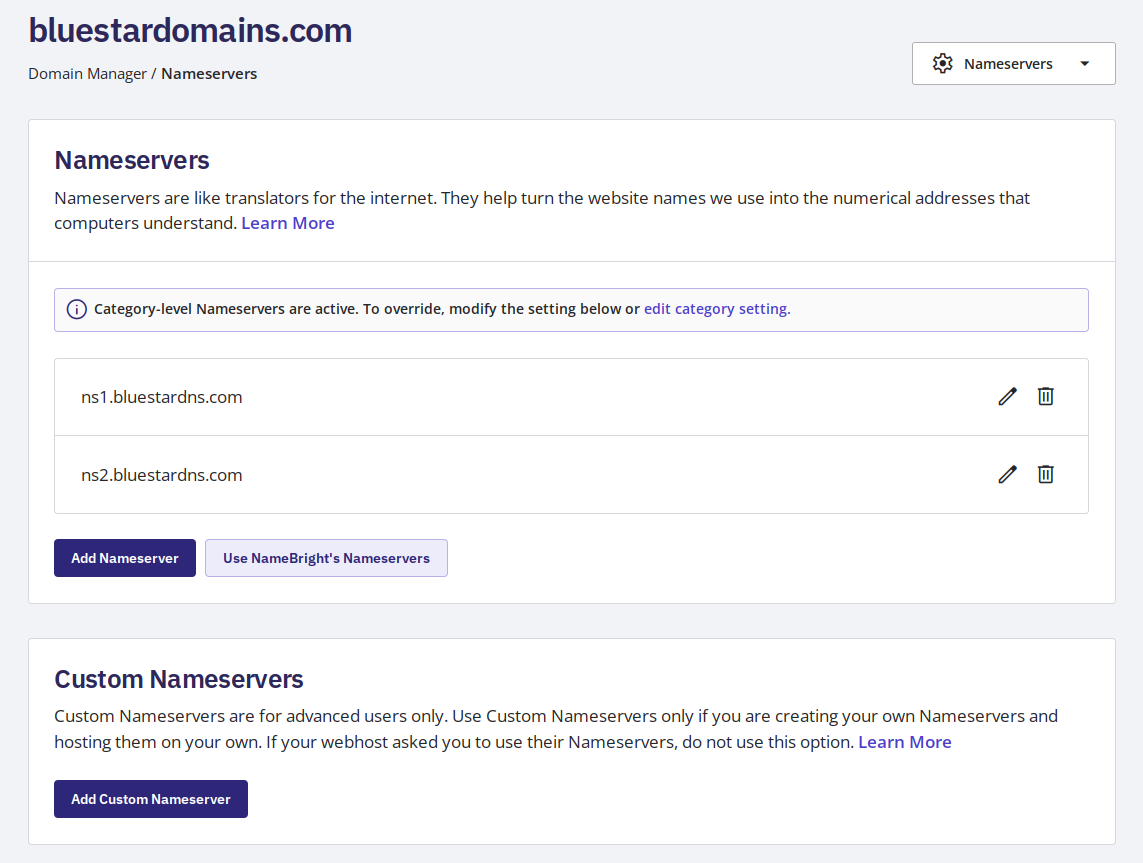
First, please log into your NameBright account, go to Domain Manager, select your domain, and find the Nameservers tab.
Then click onto "Use NameBright's Nameservers" button as shown on the screenshots below:
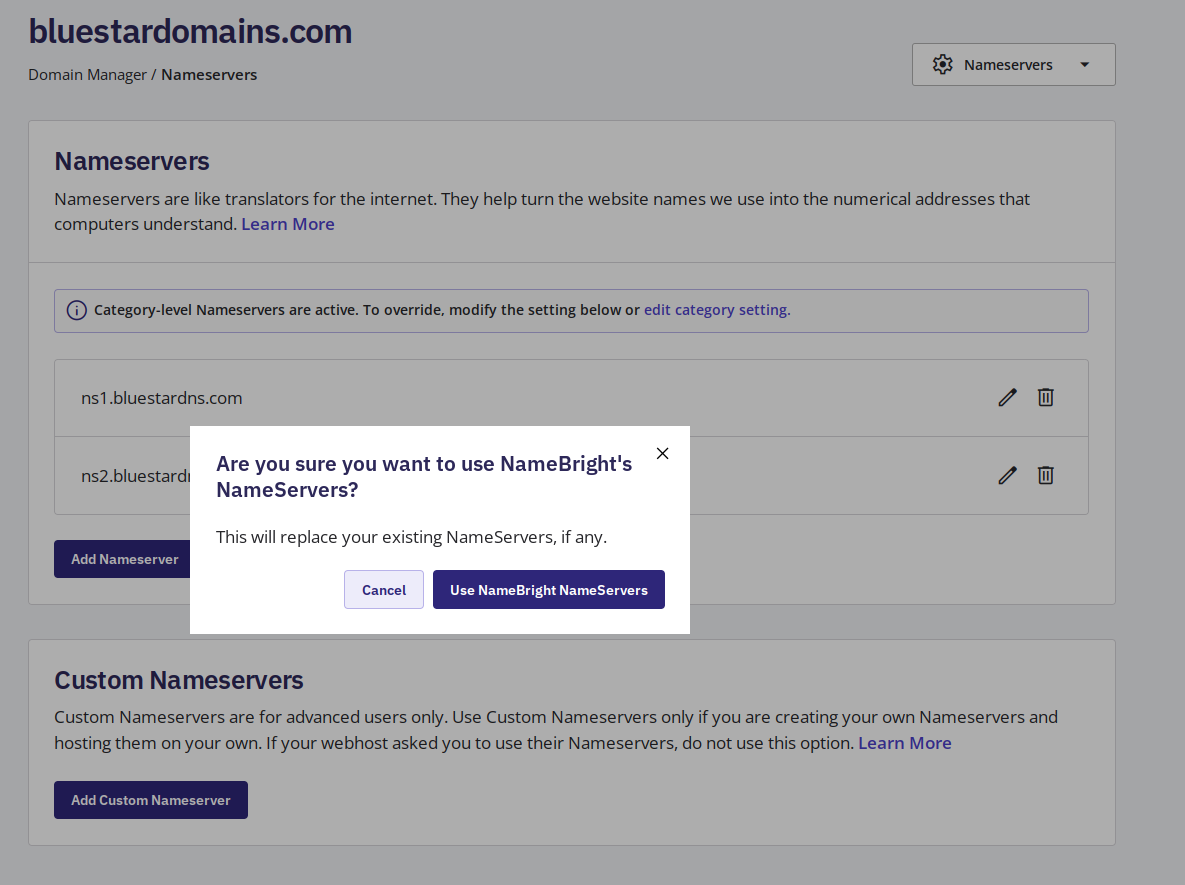
and then click Use NameBright's Nameservers:

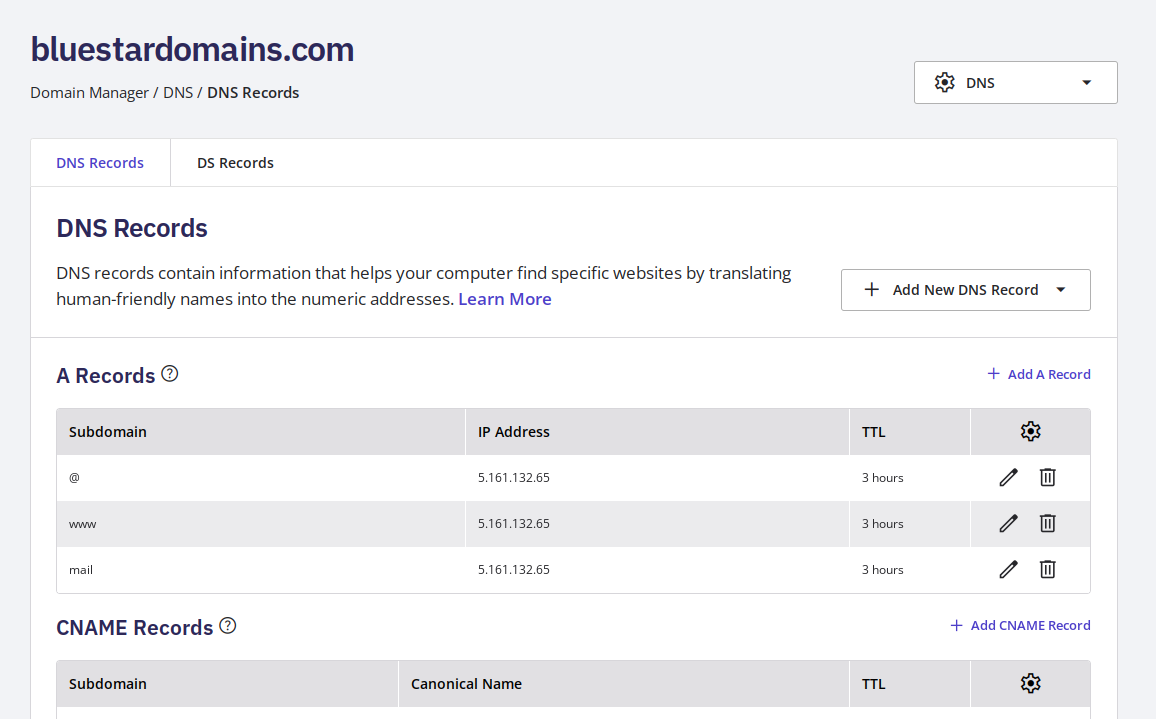
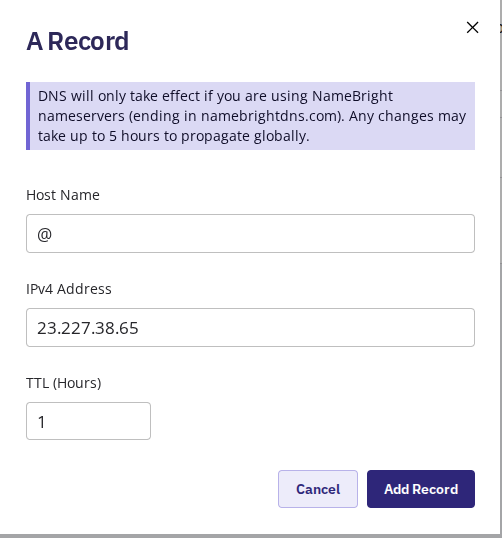
It should look similar to the screenshot below:
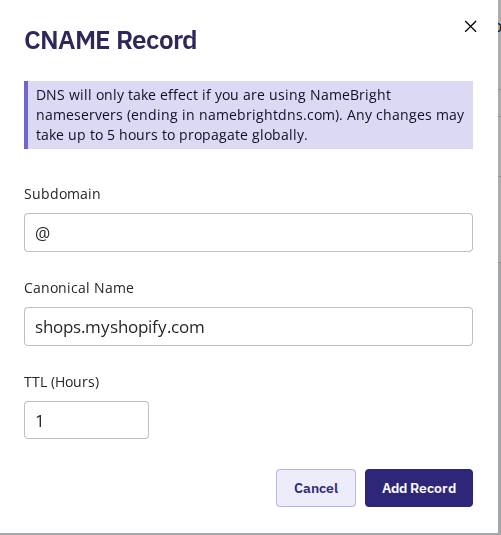
It should look something like the screenshot below:
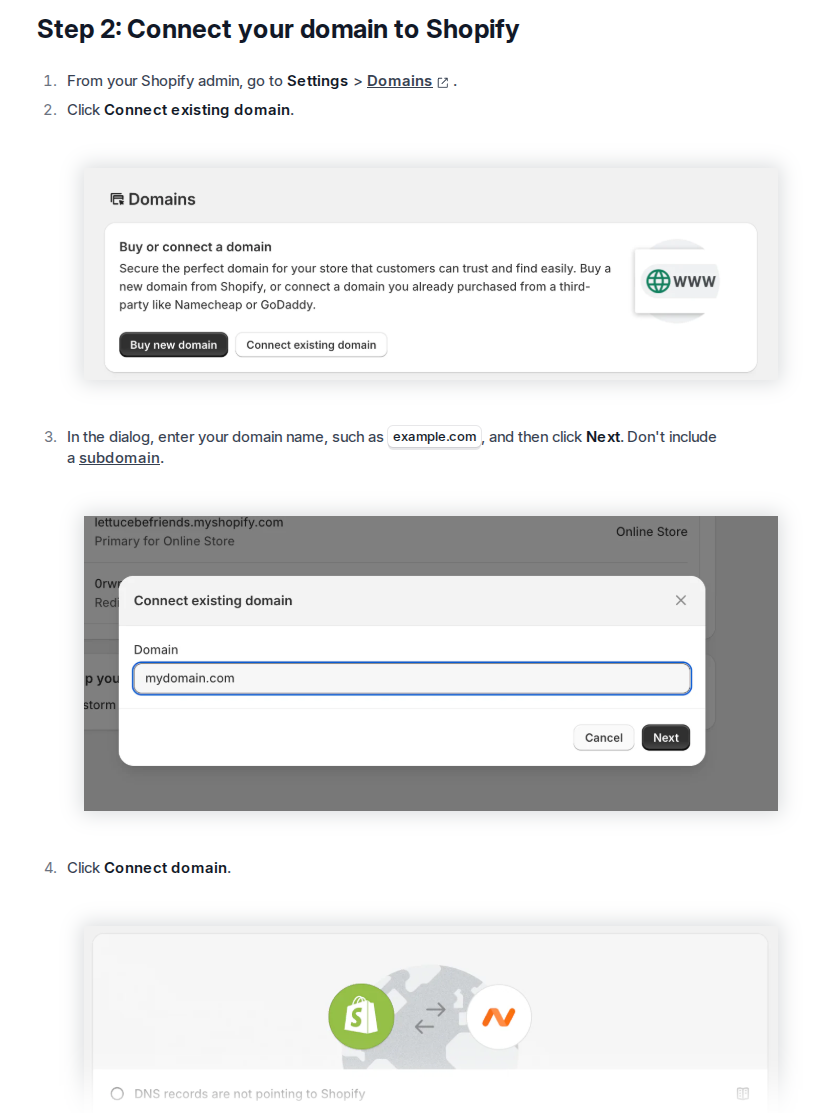
In short, you just need to go to your Shopify admin panel and:
Shopify will then verify the DNS records you entered in Part One.